How to connect to a protected SOAP Web ServiceMicrosoft's IIS has a feature where you can lockdown a SOAP Web Service to any authenticated AD User, or to a specific AD User, or to a specific AD Group. IIS does this by negotiating with the client either a Basic Auth token, an NTLM token, or a Kerberos/SPNEGO token. These authentication schemes are configured in IIS and the last two are sometimes collectively known as Integrated Windows Authentication. The SPNEGO HTTP Servlet Filter can support Basic Auth and/or Kerberos/SPNEGO tokens. However, unlike IIS, the servlet filter will only authenticate the request to determine who the user is and will not attempt to determine what the user can do (perhaps an LDAP or JDBC query can determine the what). If a soap client wishes to invoke a protected SOAP web service, then the client must provide an authentication token in the scheme that the server is willing to accept. Generally, servers do not accept Basic Auth tokens but instead favor NTLM and/or Kerberos/SPNEGO tokens. The SPNEGO HTTP Servlet Filter has a client library (i.e. SpnegoSOAPConnection) that soap clients can use to negotiate Kerberos/SPNEGO tokens with a protected SOAP Web Service. The examples below will first illustrate how to lockdown a soap web service using the servlet filter and then illustrate how to use the client library in a soap client. Before Getting Started Be sure that you have read and successfully performed ALL of the steps in the pre-flight documentation before proceeding any further. It is imperative that you perform all steps in the pre-flight since we will be using files that were created from that guide. If you don't already have a working glassfish app server that authenticates requests via Kerberos/SPNEGO, take a look at the installing glassfish example. After install, ensure that authentication is working by running the hello_spnego.jsp example. You will also need to download Sun's tutorial examples and read chapters 2 and 16 from Sun's Webservices Tutorial. Be sure that you are able to successfully complete chapter 16 before continuing with the examples below. Modifying Sun's tutorial Chapter 16 of Sun's For our example, we do not want to run the client on the same machine as the service. Instead, we will want to run the client and the server on two different hosts/machines. Edit the HelloClient.java example to reflect the following two changes:
    @WebServiceRef(wsdlLocation = "http://medusa:8080/helloservice/HelloService?wsdl")
    static HelloService service = new HelloService();
Notice that the host address uses the name of the server (DNS) rather than localhost.
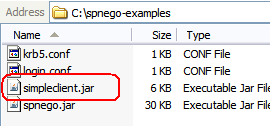
Be sure to recompile/repackage again by running Running Sun's HelloClient example Copy the simpleclient.jar from the server, under the 
From your workstation, cd to the
You should get something like this: 
Securing the SOAP Web Service The client library in the SPNEGO HTTP Servlet Filter project can invoke SOAP Web Services running in IIS or in a Java Application Server. Since the client library will work in either platform, for simplicity, we will continue to use glassfish as the platform in our examples. Before we lockdown the Hello Web Service, notice that the Sun tutorial
deploys this web service as an application under the context root

Note that We will need to re-deploy the Hello Web Service after we have made some changes to the default-web.xml file. There are two ways to un-deploy the service 1) use Glassfish's Admin UI or 2) use the ant command discussed in Sun's tutorial. The ant command to un-deploy the service is
Once the service is un-deployed, stop the app server by running the
Open the default-web.xml file located under the directory
Restart the app server by running the
Redeploy the Hello Web Service by running the ant command
Test access using Sun's HelloClient.java Notice that if you now run Sun's HelloClient program the program will fail with an HTTP Status code of 401. 
This fails because Sun's HelloClient program does not know how to negotiate Kerberos/SPNEGO tokens. In the next section, we will compile the SpnegoHelloClient.java and the ExampleSpnegoSOAPClient.java files and test access using the SpnegoHelloClient program. Test access using the SpnegoHelloClient.java The pre-flight documentation asked you to create a
krb5.conf file
and a login.conf file.
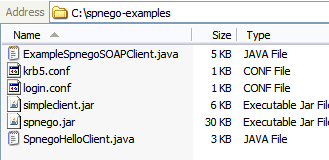
Place your version of these two conf files and the contents of
SpnegoHelloClient.zip
under the directory named 
Open SpnegoHelloClient.java in a text editor and provide the login module name from your login.conf file, and the authentication username and password to use. Also, change the server's (DNS) address to the name of your server. 
Open a command prompt to the Run the client by typing the command 
Troubleshooting SpnegoHelloClient.java If you did not get an output similar to the above, take a look at the Troubleshooting SpnegoHelloClient.java page
Links:
Troubleshooting:
Examples:
Licensing:
© 2009 Darwin V. Felix. All rights reserved.
|